Discover the capabilities of WaveMode AFM in characterizing bottlebrush polymers with unprecedented detail and speed, ...

17.11.2023

Héctor here, your AFM expert at Nanosurf calling out for people to share their Friday afternoon experiments. Today I'll show you what the next generation of AFMers was up to last week.
Zoom into the future with Nanosurf was more real than ever a week ago, during the national Swiss initiative "Zukunftstag" (roughly translated as show kids your workplace). To celebrate "Zukunftstag" Nanosurf headquarters got some special guests that learnt about AFM, how it is put together, how it os operated, and what kind of applications it is good for (see posts on LinkedIn and Twitter).
As part of the activities of the day, my colleague Paul help the young researchers prepare some samples using their own hair. So, here are the images they took, and for those of you not lucky enough to be there, I put together some basic instructions on preparing your own samples and what results to expect.
Hair is made of keratin protein. Twisted, bended, curled, woven... The three main structures of the hair, medulla, cortex and cuticle, are made of keratin combined in different ways. Surprising how the same protein can make such different structures isn't it?
A lot of information can be extracted by looking at the hair. For instance, the way it is washed and how different products affect the shape of the cuticles, and the residue on them (see ref 1). Exposure to UV light affects the texture of the cuticles, so it is possible to tell if somebody has spent a lot of time on the outside or at home (see Ref 2). If you hair is curly for instance, its cross section is quite different than if it is straight (See Ref 3). There are also differences between animals and humans.
In summary, a single hair fiber can tell a lot of stories. So let's see how to prepare it for AFM imaging.
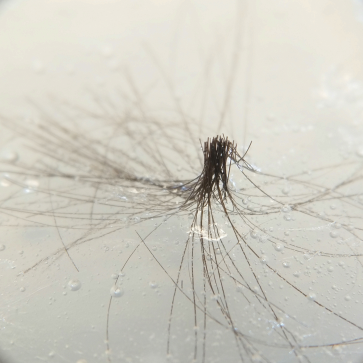
Sample preparation is not complicated, but it is important to know that every surface that touches the hair brings new contamination, and your fingers are one of the nastiest things around, because they carry a lot of grease and dust, so the first step is to make sure you are not touching the area you will be imaging.
Having an optical microscope around is useful, because sometimes you don't realize you have two fibers together and that makes the sample unstable for AFM.
Tape, either single sided or double sided works well, no special requirement, but make sure that the glue doesn't get on the area where you will be imaging.
Hair fibers are hard to see because they tend not to reflect light back to the optical microscope, so if you put it on a bright substrate (for instance lego pieces), you will see more easily where they are.
Once the sample is ready, how to setup the AFM? Which probes to use? Which imaging mode? Are the standard parameters OK?
In this case, the imaging mode you want to use depends on what you want to see. Interested in the surface contamination? Dynamic mode is likely the best choice, gentle enough to see the contaminants but not to remove them. However, depending on the contaminants present, imaging can be easy or challenging (from spots with instabilities to the probe getting stuck and jumping from one position to the next instead of tracking the surface).
If the contaminants are not so relevant and you are after the cuticle surface, static mode is the way to go. You will have to scan the same area a couple of times to fully clean it, but eventually you will get rid of the contamination. However, if the setpoint is too high, you can damage the surface. Better to do a couple of tests beforehand to see which force starts damaging the structures on the surface.
To look at the nanomechanical properties, Wavemode is the way to go. It well let you map the adhesion and stiffness in every point while recording the topography. However, in the case of soft samples, if not setup properly, you will see sub-surface features.
So, the moment of truth, what did our guests managed to get?
I was told they where trained to operate the AFM and even tuned the parameters themselves. Given the level of contamination, I will say it was not an easy task and they did quite well. We have a new generation of AFMer's.
Final remarks: This is a sample where the place where you take the image makes a big difference on the final result. If you try it yourselves, try several different places before jumping to conclusions.
I hope you find it useful, entertaining, and try it yourselves. Please let me know if you use some of this, and as usual, if you have suggestions or requests, don't hesitate to contact me.
Further reading:
1 C. LaTorre et al., "Nanotribological characterization of human hair and skin using atomic force microscopy" 2005 Ultramicroscopy, Volume 105, Issues 1-4, doi: 10.1016/j.ultramic.2005.06.032.
2 R. Richena et al., "Morphological degradation of human hair cuticle due to simulated sunlight irradiation and washing" 2016 Journal of photochemistry and photobiology. B, Biology, 430-40, doi: 10.1016/j.jphotobiol.2016.06.002
3 https://en.wikipedia.org/wiki/Hair
4 Nanosurf Gallery, hair: https://www.nanosurf.com/en/application/human-hair-treatement
5 Nanosurf Gallery, hair (another one): https://www.nanosurf.com/en/application/human-hair
28.10.2025
Discover the capabilities of WaveMode AFM in characterizing bottlebrush polymers with unprecedented detail and speed, ...

27.10.2025
Read this blog and discover advanced alloy engineering and cutting-edge AFM techniques for high-resolution, ...

14.10.2025
Discover how WaveMode technology resolves the tobacco mosaic virus structure under physiological conditions with ...

08.12.2024
Learn how to make a Python code to interface your AFM with a gamepad.
01.10.2024
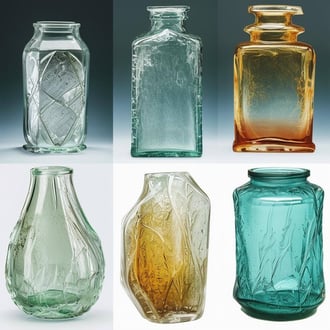
Discover how different types of glass age and degrade over time, and learn how to use AFM technology to investigate ...
11.07.2024
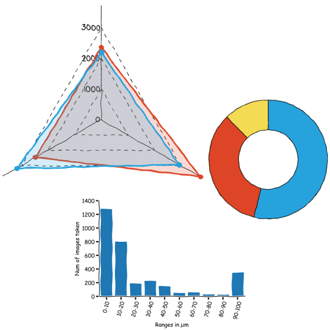
FridayAFM: learn how to perform datamining on large sets of AFM data.
Interested in learning more? If you have any questions, please reach out to us, and speak to an AFM expert.